
People often ask me how I make my silkscreens and how long they take to make so I thought it could be fun to document and explain the making of a print from beginning to end.
I started this dinosaur drawing about 6 weeks ago.
I wanted to make a new silkscreen with dinosaurs in it. My first drawing
uses the same dinosaur character I designed for a print about 4 years ago but combined in a new pose with a different background.

I wasn't happy with that dinosaur drawing and decided I needed to come up with some new dinosaurs so I spent the day drawing different dinosaur heads to figure out what I wanted these guys to look like.


Somehow from those sketches I ended up with these guys. Here is an early stage of the 2nd version of the drawing. The composition here is working much better than in the first drawing.
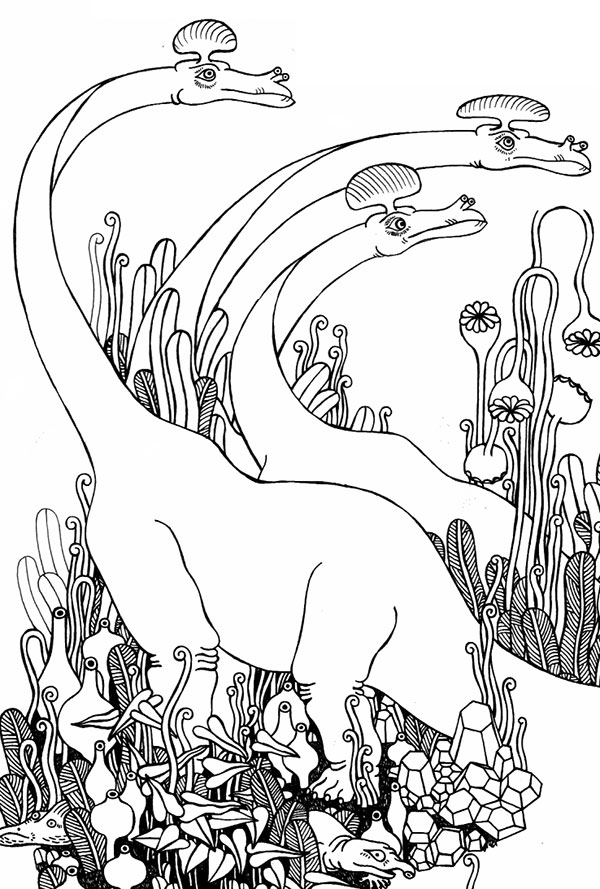
I usually do my drawings on small sheets of recycled paper, so you can see I ran out of room on the piece of paper I was using. I have a collage style approach to developing my scenes so I tested out some variations with different add-ons. Below you can see how I taped them together to make sure I liked how it worked.

At this point I decided to do a little research on plants. I drew a variety of prehistoric plants and also just plants that looked right for the piece.


I ended up using the agave plant I drew above, converting it into a kind of palm tree.


I also used the strange cactus-like rosette shaped plant above a few times in the foreground.
I glued the new parts onto the drawing, added paper to empty spots and filled in the drawing to make it a 12 x 16 inch piece.

This is how the drawing was yesterday. It's almost done, I just have to fill in the bottom left corner and fix a few things. The next step will be designing color separations for the silkscreen.
No comments:
Post a Comment